22 December, 2014

very overdue update (aka i'm a lazy person)

Oh gosh, it's been about 3 months since I've last visited my own blog (let alone written an entry) that Chrome doesn't even remember the URL any more! I need to step up my game, because I have a lot of backlogs to catch up on! Here's a quick update just to let everyone (read: myself and maybe the random stranger that somehow stumbled into here — hello!) know that I'm still perfectly fine and alive, and that I haven't been eaten by any strange Japanese mythical creatures (yet).

There's only 3 days until Christmas, (can you believe it?! Because I can't! Especially with the non-festivity that occurs in Japan) and I'm here, still at work, typing away. My last day of school is on the 24th, which means I've almost finished teaching my first semester! I remember feeling completely out of the loop when I first arrived back in August — actually, I still feel out of the loop all the time, but I guess that comes with being a foreigner in a very un-multicultural society (more on this another time).

I'm actually scheduled to "work" (I use this term very loosely on days during the kids' holidays, because well, it's mostly just down time in my case) on Christmas Day and Boxing Day, but I've taken annual leave for 2 reasons: 1) I am not "working" on Christmas Day, and 2) I'll be going to Singapore and Malaysia! With the New Year's holiday we're entitled to, on top of weekends and a couple of days of alternate leave that I've accumulated over the past 4 months, I only had to take one day of annual to get a total of 12 days on holiday! (If you count the days I'm flying as well).  

In preparation, I've… actually done nothing besides booking a hair appointment for tomorrow (gotta look decent in my photos, yes?). I haven't even started packing, and knowing me, I will end up stressing during the last few hours before I have to head towards the airport. My flight is at 9.30am (on Christmas Day — I better be feasting like a king on the plane), and my plan is to take the very first train at around 5am towards Kansai International Airport, so there will be no sleep for me prior. I also have a 忘年会 (bounenkai, an end of year party/dinner) with one of my schools on the night of the 24th, so let's hope I hold up okay! I had one just last Friday with my teachers from another school, and the shit (excuse my French, but there is no better word to describe it) that teachers talk about when students are not within the vicinity is hilarious. Great night (besides the insane 6,000 / $65 I had to fork over), would totally do again.

This post is already longer than I had expected it to be, and I'm not even finished yet! Proves that when I'm not lazy or procrastinating (which is very rare, sad to say), I am capable of throwing together words on the screen for some bored and lonely person to read (I don't mean you, I mean myself when I'm going through my own posts years later and wondering what kind of strange things were going in my head). To end it off, (and as a reminder to myself), here are the blog posts that I need to catch up on, even if just to remember the awesome time I had:
  • Koya-san / Hyogo / Kyoto-Osaka / Thanksgiving-Shingu trip
  •  My Halloween / Christmas lessons (aka games that the kids played)
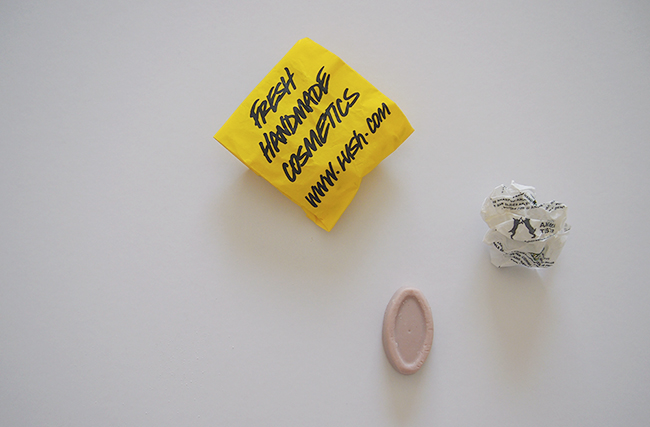
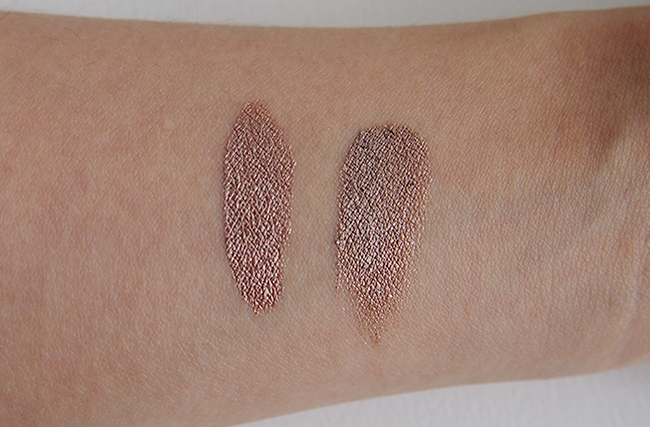
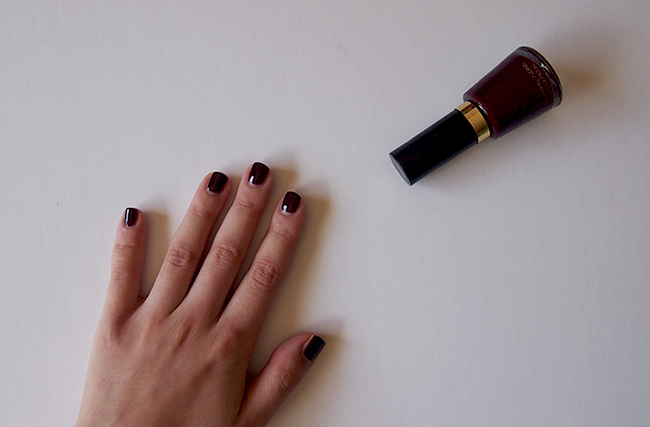
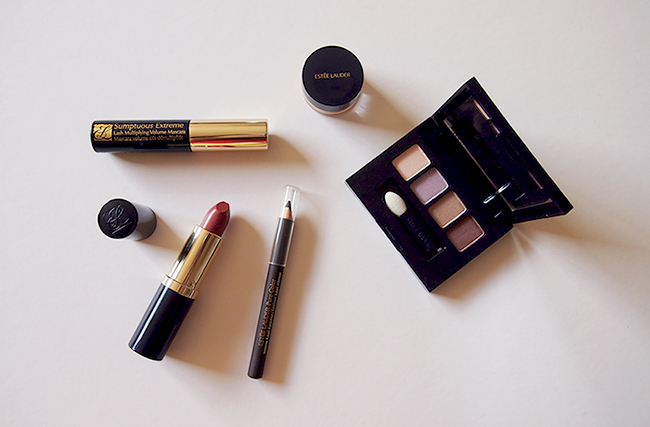
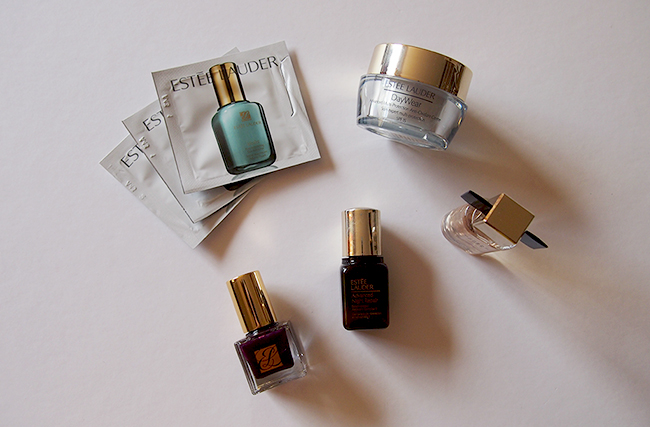
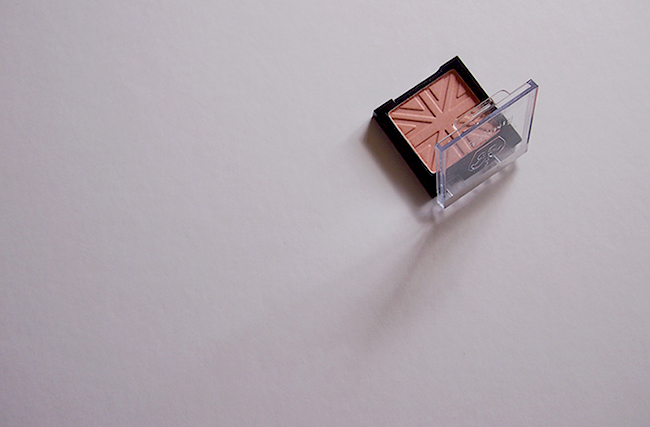
  • New beauty purchases
  • Taiko experience
  • …and I'm drawing a blank, but I’m sure there was/will be something!
This shall be all for now, it's pass my contracting hours and I'm ready to go home (and do nothing as per usual). 

27 September, 2014

lush: full of grace serum

lush full of grace serum skincare


Lets get back on track with a beauty related post, shall we?

Marketed for dry, sensitive skin, I wasn't sure how Lush's Full of Grace serum bar ($19.90) was going to work on my extremely oily skin. It's not a product I would have purchased for myself — I received this as a prize for winning one of Lush's Facebook competitions (thank you Lush Newmarket!) It's a strange looking serum, in solid form rather than liquid, and it didn't come in any particularly durable packaging either. In order to take it with me to Japan, I cleaned out an empty jar and cut the serum into smaller chunks. With the Japanese summer being over 30°C everyday, I certainly didn't want it to melt all over my luggage during transit. (Let's just ignore the fact that I've been in Japan for almost 2 months now...)

The serum is formulated with murumuru and cupuacu butter; calming ingredients such as calamine and rose infusion/oil; almond oil; and portobello mushrooms for its antioxidant properties. Despite being a solid bar, Full of Grace is easy enough to use: simply warm between your palms and gently massage the oil onto your face. I personally only find this method doable during autumn and spring (or places with moderate tempatures regardless). In the Japanese summer heat, the serum melts into a soft cream-like texture, and I apply it like I would a moisturiser — scoop up a bit and melt between the palms, then pat onto my skin. It also takes a little more effort during winter because the bar stays solid. In that case, I apply the bar directly onto my face before patting the product in with my hands. Because the application is heavier with this method, I would only recommend it for those with dry skin, or during the colder months.

Unlike some other oils, I don't find Full of Grace to be overly greasy even on my skin type. I am, however, a regular facial oil user so my preferences may be a little different. Due to its oil components, I tend to use this as a night time moisturiser, or under a sheet mask to help the essence absorb better (it is a serum after all). I haven't used the product frequently enough to see any noticeable differences in my skin, but it definitely provides just the right amount of moisture. I usually reach for this when I have break outs as I know it won't aggravate my skin any further.

Despite being a serum aimed at dry skin, I think anyone can benefit from using Lush's Full of Grace. From rosacea to acne prone skin, dry to oily; it's a great all rounder for all skin types. I've already purchased their Angels on Bare Skin cleanser recently upon Caroline Hiron's recommendation, will report back later on how that goes...

22 September, 2014

JET: connected to the world again...

I finally have internet! It's taken a long time (just like everything else in Japan — opening a bank account, buying a cellphone, sorting out rubbish...) but I am now finally connected to the rest of the world on my laptop rather than on my phone with a mere 7GB data limit.

It's been 3 week since my last update, and while a lot hasn't happened yet, I feel like a lot has happened. I lived in Japan 3 years ago for 5 months during a one semester university exchange programme, so not all things are a complete surprise to me. However, while there are certain aspects that I got used to very quickly (food, living arrangements, biking everywhere), work life has been the hardest to adjust to. Unlike before on a student visa, I am now a government employee. Being a teacher is so drastically different to my previous job in a call centre for an insurance company... it's going to take a while to fully feel comfortable in these indoor shoes of mine. (See what I did there?) 

Everyone who participates in the JET Programme ends up in a different situation — since we are placed in different prefectures, hired by different organisations, teach a wide range of school levels, encounter different people... and so on and so forth. For the record, here's my situation, in a nutshell:
  • My placement is probably between rural and semi-rural — Yuasa-cho is a small town of around 12,000 people, surrounded by mountains; rice fields; and mikan fields. 
  • I teach exclusively at elementary and I'm the ALT (assistant language teacher) for 3 different schools.
  • My biggest school has 400+ students, while my smallest school has 32 students.
  • At my 2 smaller schools I teach grades 1-6, and at my biggest school I only teach grades 5 & 6.
  • Despite my job title being the "ALT", I plan all of my classes, and conduct them on my own. Team teaching doesn't happen often in my situation.
  • I'm not allowed to drive during work hours, so I bike everywhere — depending on the school I am going to, it can take me between 10-30 minutes. And yes, I have to bike in the rain.
  • I live in a one-room mansion, which seems to be rather uncommon for a semi-rural placement. Most JETs I know live in a tatami style room with a separate living space, and a bigger kitchen/bathroom.
  • I encounter bugs more than I would like to (cockroach count so far: 12. That's more than I've see in my whole life in NZ... I also believe that insects in Japan are on steroids — they are massive and cockroaches can fly). And I don't even live in the mountainous area...
  • My BoE (Board of Education) furnished my apartment for me with the main essential items. I only had to purchase items that I deemed essential, but not my BoE (hair dryer, blender, etc).
  • Although my town is relatively small and I'm about an hour away from Wakayama city, it only takes me around 2 hours to get to Osaka. It may not be cheap, but placement wise I am very happy! 
And that's it really (so far)! I'm really hoping to get back into blogging on a regular basis — and now that I have internet, there's no excuse not to blog.

(Feel free to pester me if I don't!)

25 August, 2014

jet programme: first 2 weeks (part two)

Following my last post.

After arriving in Yuasa, the first thing we did was head to the Board of Education (my contraction organisation). I was first introduced to the remainder of my co-workers at the BoE, then made my way to all 3 schools I'll be teaching at. Luckily my supervisor had advised me of this in an email beforehand, so I made sure I looked somewhat presentable when stepping off my plane. I had to introduce myself each time I met someone new (they take self introductions very seriously in Japan), so I kept my speech fairly short.

During pre-departure orientation back in Auckland, I was advised to repack all my luggage make sure my お土産 (omiyage, gifts/souvenir) were with me as I'd need to hand them out when I first meet everyone (mine were in my check in luggage, which I had planned on sending directly to my prefecture from Narita Airport). I was told that if I missed this first opportunity, it would be very hard/awkard to do so later on. I stressed slightly over this as there was no way I'd be able to fit my valuables, electronics, 4 days worth of clothing and omiyage for 50+ people all in my limited 7kg carry on. In the end, I decided not to rearrange my luggage and I've been handing out my omiyage at random times throughout the summer break with no problem whatsoever (ESID guys, ESID).

After heading to the supermarket to pick up a few essentials, we made our way to my apartment. I've been pre-arranged a one-room mansion, meaning it's a one person apartment with literally one room (the name says it all) as my living space/bedroom. I do have a separate kitchen and bathroom, but they are very small. Looking at the space initially and seeing my 2 giantic suitcases (they arrived safely!) propped to one side... I was apprehensive as to whether I'd be able to fit everything or not. I've definitely made it work, but I'm still hoping to be able to utilise my space a bit better.

japan wakayama yuasa view
view from my apartment
I started "work" the very next day at the Board of Education. As I mentioned in my brief update, there's technically no work assigned to me yet. I've been sorting out a lot of paper work in the first few days, such as opening a bank account; buying a phone; registering my address with the town office... but for the most part I've just been at the BoE. This is the best time get acquainted with the textbooks we will be teaching from, but regrettably I haven't been using my time to its fullest. I've prepared a powerpoint presentation for my first week of classes (the theme is self introduction — see, I told you) and thought of a small game I can do with the kids, but I'm not sure if it'll work well. I may have a degree in Linguistics & English Language Teaching, but my knowledge is all theory based, not practical. If I'm not doing that, I'm either blogging, window online shopping, or checking my emails over and over again. (Please, don't be like me — use your time wisely and prepare some lesson plans! However in my defence, I don't have internet set up at my apartment yet, so... at work it is).

I've been assigned 3 schools — I go to my main (and biggest) school on Monday, Wednesday, Friday; my second school on Tuesday; and my final school on Thursday. While my main school is close (under 15 mins by bike), my other 2 take around 20-30 mins. I'm really unfit, so I'm hoping this will change for the better...

I can't believe how fast time has flown by — I actually start school tomorrow! I've heard that a lot of schools outside of my area don't begin until September, so we're about a week early. I've got a 30 second assembly speech prepared, class presentation sorted, and an activity up my sleeve (that I'm really hoping will work). Wish me luck! 

20 August, 2014

jet programme: first 2 weeks (part one)

It's been well over 2 weeks since I've been in Japan (wow has it been 2+ weeks already?) Which means another update is in order! Nothing has changed much since my last update, but I thought I'd briefly talk about what has happened in the time I've been here so far.
 
Lets' start off with Tokyo Orientation, shall we? We had 2 days jammed packed with seminars, speeches and presenations to prepare us for our new lives in Japan. It started on August 4th, just a day after we arrived in Tokyo after an 11 hour flight (and a 2 hour bus ride). We stayed at Keio Plaza in Shinjuku, which was very luxurious! I do feel bad for the other guests who also stayed at the same hotel during our orientation, especially when there are over 900 of us trying to use the elevators all at the same time... (I had to wait 30 mins for one of the lifts once ಠ_ಠ)

japan jet programme 2014

Because Tokyo Orientation is very formal, we had to be in business attire for the presenatations. Shirt, blazer, tie (for men) — the complete works were required for the opening ceremony, while "cool-biz" was allowed for the remainder of the sessions (which simply meant no blazer and tie necessary). Wearing a suit in the middle of a Japanese summer is not exactly my first choice when it comes to clothing, but as long as you stay inside the hotel, it's bearable. While the seminars were very in depth (sometimes too long), and full of information, I felt like a lot of it wasn't particularly relevant for my situation. For instance, I won't be able to apply the key points from the session on teaching grammar and/or writing at my elementary schools. As much as I dislike the infamous JET acronym — ESID, which stands for "every situation is different", I'm finding it more and more relevant as each day goes by. (I might elaborate on this in another post).

Besides the lecture-esque presentations, we ended with a buffet dinner on the first night. I was finally able to meet other Wakayama JETS — there's only about 15 new Wakayama JETs this year, quite a small group compared to other prefectures such as Hyogo or Nagasaki. Unsurprisingly, they're mostly from America, but coincidentally the only other New Zealand Wakayama JET (he's from Wellington) has been placed in the town right next to mine. On the second (and last) night of the orientation, we were kindly welcomed by the New Zealand Embassy in Shibuya.
 
On Wednesday, I gathered with my fellow Wakayama JETs at 7am, and we headed to Haneda Aiport for a domestic flight to Osaka. It was only a short flight, meaning it won't be too impossible for me to fly to Tokyo, (as long as I have the funds to do so!) My supervisor, another colleague from the Board of Education, and the other JET in my town came to pick me up at Kansai Airport. After an hour or so of driving, I finally arrived in Yuasa!

Part 2 here (coming soon).

07 August, 2014

small update

Hello everyone!

It's been a while since my last update (read: April, oops) — I'm still here, I swear! Life has been a little crazy in the past couple of months, but I now finally have some time to blog. (And by that, I mean I have nothing else to do). Recently, I quit my contact centre job, and moved overseas to Japan to start my teaching career (sort of).

I did it through the JET Programme.

The purpose of the programme is to promote international exchange between Japan and other countries, and they do this by employing foreigners from overseas. (You can read more about it here). I've been wanting to do this ever since I first heard about it in high school (exerpt from my Statement of Purpose, much?) and now I'm finally here after about 7 years. It was an extremely long process — from application to interview, waiting for acceptance, placement, and more waiting... and while I can't exactly say if it's worth it or not yet, I now have another thing to cross off my non-existant bucket list!

I've been placed in a small town called Yuasa in Wakayama as an ALT (Assistant Language Teacher). I only arrived yesterday after being in Tokyo for a 2 day orientation, and I'm here at the Board of Education (my contracting organsation), typing away. It's the summer holidays so there are no classes until the 25th, but since I'm being paid by the government, I physically have to be at the BoE (or one of the schools), with nothing to do. It's a little silly in my opinion, but at least I can use this time to work on some lesson plans, study Japanese, and blog a litte.

While I intended for this for be primarily a beauty blog, it's taken a very different direction. I'll definitely continue my reviews once I've settled in a bit more, but for now, we'll see how it goes!

30 April, 2014

battle of the bronzes

maybelline bad to the bronze rimmel rich russet


When I was debating whether to purchase Rimmel's Scandaleyes eyeshadow paint in #006 Rich Russet or not, I Google'd to see if there were any direct comparisons of it to Maybelline's 24HR Color Tattoo in #35 Bad to the Bronze (£4.99). While most blogs mentioned that they were very similar, I don't remember anyone ever directly saying "if you have one, you don't need the other". That was my justification for wanting to have both in my collection. Now that I've owned both for quite a while, I thought maybe it's about time a proper comparison was in order. 

maybelline bad to the bronze rimmel rich russet
rich russet; bad to the bronze 
Colour wise, they are indeed very similar. Bad to the Bronze is a smidge darker, with more of a silver sheen running through the shadow. It has a buttery texture, and is very easy to blend. While you can definitely get away with one swipe if picking up more product, it can get a little chunky that way, so I recommended building up the intensity with 2 layers. The finish is slightly tacky, which makes it a great base for applying powder eyeshadows on top. Rich Russet on the other hand, is less opaque, and required 2-3 coats for a similar opacity to Maybelline's cream shadow. It comes with a doe foot applicator and applies wet, before drying down to a completely smooth finish. Once it dries, it doesn't budge, so you really need to blend out all the edges beforehand. The packaging makes the shadow incredibly portable and great for travel or touch ups throughout the day.

While the longevity claims are a tad outrageous, I do think they are both very long lasting. I personally have very oily lids (e.g. the Bobbi Brown Long-Wear gel liner gave me panda eyes within an hour or so), and over a base (I use MAC's Paintpot in Soft Ochre) they both lasted around 7-8 hours. Bad to the Bronze managed to stay strong, but creased and left an unflattering beige line in my double eyelid crease. Rich Russet creased less, but faded to a light wash of colour by the end of the day. 

Now to answer that very one question I had before purchasing these products: Do you really need to have both? No, you don't. On the lids they look almost identical, and the wear of it is very similar. But as a true makeup lover (read: addict), for £4.99 each (or $10.91 with the current exchange rate), why not have both? I honestly love both products, but if I had to choose one, I personally prefer Maybelline's offering. I like how it can double up as a base, and the colour selection is more up my alley in comparison the the other Rimmel shadow paints. (I have my eye on #65 Inked in Pink and #70 Pomegranate Punk next...)

17 April, 2014

revlon nail enamel: #570 vixen

revlon nail enamel vixen
As we're well into autumn (the recent weather is certainly making a point), I decided to get into the mood, and pulled out the darkest nail polish I have in my collection (besides black): Revlon's nail enamel in #570 Vixen. This caught my interest when Lily Pebbles mentioned it in her 2013 Beauty Favourites video. I purchased this on a recent vacation to Macau, and it was about 25 MOP on sale at Sasa (converts to about $4 in New Zealand). 

The polish is a deep vampy burgundy; often compared to Chanel's Rouge Noir. It translates much darker on the nail compared to the bottle, and requires 2-3 coats to be completely opaque. Two coats were used in the photo above, but my right hand took three coats as the first layer was a bit thin and streaky. The finish is gel-like and glossy enough on its own, but I always recommend applying a top coat for some extra shine and to prolong wear time. My manicure (trying to sound professional...) lasted about two days before the tips started to wear off, and started chipping by day three without a the use of a top coat. The staying power isn't the greatest, but the shade is so beautiful that I'm willing to look past that. I haven't tried Chanel's classic shade to compare, but a few dollars for an almost exact dupe? I don't think I'll need to...

The problem with dark nails is that you need to be precise in perfecting the edges, and it can really emphasis your nail size (though this is only an issue if you have wide nails like mine). A little trick I like to do is to leave a gap between the polish and the very edge of my nail (I tend to leave a much wider gap on my thumbnails as I dislike the shape of them). No one will know unless they really examine up close! 

12 April, 2014

estée lauder: gift on the go

estée lauder gift with purchase

Never in a million years would I expect to purchase, not one, but two Estée Lauder products in one transaction (and in New Zealand at full RRP)! Being a luxury brand with a relatively long history, I've always associated it with mature women, and a brand I never really gravitated towards. That is, until I found out about their amazing gift with purchase promotion at Smith & Caughey's. The gift was simply irresistible and looked too good to be true. 

Can you believe that I only paid for the two Pure Color Envy lipsticks, but walked away with everything in that photo? Because I'm still mind blown. While testers are offered for almost every makeup product available, samples are right on the other end of the spectrum — taboo, and never to be spoken of in front of a counter makeup artist (I kid). According to Estée Lauder, the gift is worth over $240 based on the recommended retail price of the full sized products. Of course, most items in the gift bag are sample sizes, but they're all very generous amounts. I purchased #410 Dynamic and #450 Insolent Plum (spending a total of $118) from the Queen Street store with the help of a lovely girl named Sandra. She was so patient with me and tried on all the products I asked her to. High end makeup counters can be a little intimidating in my opinion, and some assistants can be (for the lack of a better word) snobby. I work in a customer service environment, so I definitely appreciate good service.

estée lauder makeup

That aside, let's have a look at the contents, shall we? There were two sets to choose from, and I opted for the purple/warm toned set. Makeup wise, the bag consisted of their: Pure Color Long Lasting lipstick in #17 Rose Tea, Pure Color Intense Kajal eyeliner in #02 Blackened Cocoa, Sumptuous Extreme Lash Multiplying volume mascara in #01 Extreme Black, and a mini palette consisting of their Pure Color eyeshadows in #10 Ivory Slipper, #67 Lilac Whimsy, #18 Sepia Sand, and #07 Smokey Ember. Sandra also depotted a sample of the Double Wear Light foundation in Intensity 3.0 for me to try. She tried the original formula on me the day before and I wasn't a fan of the cakey, settled-into-pores look. I wanted to love the foundation so much, but at least I didn't fork out $80 before I found I it didn't work for me. (I am around a MAC NC30 and got matched in the shade 2W2 Rattan, if anyone was curious). 

estée lauder skincare perfume nail polish

For skincare, a sample of their best selling Advanced Night Repair Synchronized Recovery Complex II serum and Advanced Multi-Protection Anti-Oxidant creme were included. Oh my goodness. ANR! This is pretty much the sole reason (not really, but really) as to why I wanted this gift bag so much. I get to try the famous ANR before shelling out $92 for a 30mL bottle? Yes please. If a product is Caroline Hirons approved, it's going on my to-try-when-I-have-the-funds-list. (Oh, my poor, poor bank account...) To complete my skincare addiction, Sandra also threw in a few sachets of the Idealist Pore Minimizing Skin Refinisher serum. And lastly, the final two products are their Modern Muse eau de parfum, and Pure Color nail lacquer in Black Plum (perfect for autumn/winter)!

I've never tried Estée Lauder products before, but they've done an excellent job at recruiting another beauty addict (aka me) to their consumers' list. I love the fact that you only need to purchase two products to qualify, and there's no minimum purchase amount. The offer is available exclusively at selected Smith & Caughey's stores until Sunday 13th April, so make sure to grab yours before it ends! 

Edit 16-04-14; Post has been updated with photos. Here is the link to my instagram photo that I originally used.

10 April, 2014

recent empties: episode #01

the body shop, origins, bifesta
I love watching empties videos on YouTube. The idea seems a bit silly; someone (usually halfway across the world) shuffling through and displaying their accumulated trash over the past few weeks/months. But I'm sure most of you would agree that it's one of the best ways to discover new products. I've also managed to gather a few empty bottles and tubs for the purpose of taking the above photo, and doing a mini review on each. 

As you can see, I've finished quite a few products from The Body Shop recently. Quite a while ago, there was an amazing gift with purchase event and I just had to spend the full $80 to get it. Both the Moringa Body Butter and the Body Butter Duo in Macadamia were freebies, and to be honest, I'm not a huge fan. Both sides of the macadamia were too greasy for my liking, and the formula for dry skin made my legs incredibly itchy. The moringa was better in terms of texture — less thick and not sticky, but the scent isn't my favourite. TBS body butters get such amazing hype, and I really want to love them, but it just seems like I haven't found the one for me yet. 

The Vineyard Peach Cream Body Scrub on the other hand; I really enjoyed using! The scent is absolutely delicious and that's what propelled me to buy it in the first place (besides the GWP). It isn't as exfoliating as some other scrubs I've tried, yet effective enough to create a smooth base for shaving. It's both gentle and moisturisng; great for when I don't want to use something too abrasive on my skin. I'm not sure if I'd repurchase as of yet, but I would definitely be keen on trying some of the other flavours.

This is the second bottle of the Bifesta Brightup Cleansing Lotion (¥1,050) that I've used up, and it served as my main makeup remover way back in 2011 when I lived in Japan. 
Micellar waters are huge amongst beauty bloggers, and it only took me 3 years to realise that I've been using one all along! I've forgotten how much I enjoyed removing my daily face with this (after switching to cleansing balms), and recently rekindled my love for it. I wouldn't use it as my sole cleanser; but it's great as a pre-cleanse on light makeup days (or when I'm just a tad too lazy to balm it up). 

Lastly, we have the Origins Super Spot Remover ($25). I picked this up from Mecca Cosmetica when I was suffering from an eruption of breakouts along my chin and jawline (something that happens every month or two — the joys of having blemish prone skin). The Origins offering definitely helped to reduce redness and the overall appearance of spots after a few days of use, but I would say it's more effective against minor blemishes as opposed to under the skin breakouts. It's not actually as drying as the sales assistant made it out to be, which is always a plus in my book.


As a beauty hoarder (ahem) enthusiast, it's very satisfying when a product gets used up to the very last drop. Time to get cracking on the rest of my collection...

04 April, 2014

rimmel lasting finish soft colour blush: #010 santa rose

rimmel lasting finish soft colour blush: #010 santa rose
I've never really been a huge blusher type of girl. I'll take eyeliner, brows, or even lipbalm over flushed cheeks any day, and my minuscule collection consists mainly of bright coral pink hues. I decided it was about time I step up my game and add a bit of variety into my everyday cheek colour — but it did take me a while to decide on which one. I wanted something natural and fuss free; something preferably from the 'drugstore' (nothing is considered drugstore in New Zealand, really) so I wouldn't have to break the bank.

Cue Rimmel's Lasting Finish Soft Colour blush in #010 Santa Rose ($6.98). I came across this on ASOS the other day and vaguely remember Alix (icovetthee) mentioning this in her makeup collection video. I did a quick Google search, and it popped up on a lot of bloggers' favourites, top blushes, and 'best mediocre looking product that turns out to be amazing' lists. 

Complete with scratches on the flimsy looking plastic lid; the packaging isn't the best. Still, I definitely do appreciate the makeover it has had — the design is much better than the old trapezium shaped packaging, and the embossed Union Jack on the surface is a nice touch. I was initially worried that the colour would be too light on my medium Asian skin tone, but I couldn't be more wrong. While powdery when picked up with a brush, the pigmentation is on par with a lot of higher end brands. The trick to this blush is to apply with a light hand and avoid going overboard (which I did the first time. My cheeks resembled a monkey's butt). On my skin tone, it comes off as a warm peachy pink, with just a hint of brown.

I highly recommend these blushes; they're great quality, affordable, and a good beginner's product to start off with. ASOS is one of my favourite online sites to pick up beauty products — they often have discounts (permanent 10% if you're a student, which I sadly no longer qualify for), free shipping, and they stock a range of products unavailable in New Zealand (Bourjois, Pixi, Paul & Joe, just to name a few). I have a number of sites that I use and trust when it comes to online shopping, but we'll save that for another time.

31 March, 2014

pink gradient lip

lioel blooming pop pinky tint rimmel apocalips stellar


Bright lips are pretty much the hottest thing in East Asia right now, and it's all thanks to Korea's superstar, Jun Ji Hyun. Famous for her role in My Sassy Girl, Jun Ji Hyun recently starred as Cheon Song Yi from My Love from Another Star (별에서 온 그대), and sales for almost every beauty related item she used in the drama sky rocketed at one point or another. I was never really into K-dramas before, but this was highly addictive — a great combination of romance and comedy, with just a touch of fantasy. (Plus, Kim Soo Hyun is perfect).

In the drama, Jun Ji Hyun had very natural makeup, with the main focus being her lips. The two most popular shades that she used would have to be IOPE Color Fit in #44 Forever Pink, YSL Rouge Pur Couture in #52 Rosy Coral. (Master list here). As much as I want to jump on the bandwagon and purchase ALL the lipsticks she used, it's almost impossible to track down these products without having to pay an absurd amount. (Seriously?!) Instead, I picked out two lip products I already had: Lioeli Blooming Pop Pinky Tint and Rimmel Apocalips in #501 Stellar, in hopes of creating that perfect Korean gradient lip.


Jun Ji Hyun inspired pink lip


I started off by applying Lioeli's lip tint all over my lips, making sure not to use too much. The more you layer it, the brighter it gets — which doesn't seem to flatter my skin tone. The texture of this is a bit thicker than your standard watery tint (think Benefit's Benetint), and has a milky consistency. I like that it's moisturising, but I did notice a slight tingly effect on the lips when wearing this (nothing too bothersome). Next, I dabbed Stellar onto the centre of my lips and blended it out with a finger. It's super pigmented, so I only applied a small amount and made sure it didn't overpower the rest of the lip. If worn as a full on lip, the Rimmel Apocalips lip lacquers tend to fade and leave a highly unflattering ring after eating. I love the colours and formulation otherwise, so I'm willing to let this aspect slide, but it does require maintenance on the wearer's part. 

In true Korean gradient lip fashion, concealer or foundation is generally used along the edge of the lip to further enhance the gradual effect. I skipped this process because Jun Ji Hyun's lips are painted perfectly right to the edge. While I won't be getting my hand on any of the lipsticks she used any time soon (the two mentioned above are already on my wishlist), I will at least be able to imitate the trend using what I have on hand. Now if you'll excuse me, I'm going to indulge in another Kim Soo Hyun drama. 

26 March, 2014

topshop nails: boy next door


topshop nails boy next door
Ever since Essie's Mint Candy Apple release in 2009, the mint green/blue trend has been going strong. I've wanted to carry that colour on my nails for as long as I've been into painting my nails, but shelling out $24 for a bottle of nail lacquer isn't something I'd like to do. Then I saw this beautiful shade while (casually) browsing at Topshop and just knew I had take this baby home with me.

Topshop's Boy Next Door ($15) is something I didn't intend on purchasing, yet it seemed like the right thing to do. The packaging is sleek, super cute, and fits nicely amongst the few polishes that I have. With 8ml of product, it's smaller than OPI (15ml) and Essie (13.5ml); accompanied with a cheaper price tag. I prefer it this way; because finishing a bottle of nail polish before it becomes too thick and goopy seems virtually impossible. (On the other hand, it's tempting me to buy more...)

Based on swatches online, Mint Candy Apple falls right in between green and blue, and can gravitate towards either shade depending on the wearer's skin tone. Boy New Door however, is definitely a duck egg blue. (Excuse the wrinkly hand above; it's an Asian gene thing). The consistency is thinner than OPI polishes, and this took about three coats for a complete opaque finish. I am super impressed with the formula; it took no time at all to dry between coats, and I was able to get back to my usual activities within 1.5 hours of painting my nails. That might sound like a long time, but I've had experiences where my polish would dent after many hours of careful handling. Not cool. I'm on day three and the tips only just started wearing off. 


This looks amazing on the toes during spring/summer, and I'm really hoping the weather stays warm enough for me to continue rocking these brighter shades. Oh autumn, please be good to me...